fbpx

Simplify Your Wrapping

How many types of wrapping paper, bags, bows, ribbon, and tissue paper do you have?


Simplify your gift wrapping

and create a signature style!

SIMPLIFYING 

Every October we focus on clearing clutter simply and easily with our 30 Day Clutter Clear Out Movement. We’ve created powerful tools you can utilize any time of year to support your journey. If you have some extra time, hop on over there to access these offerings. If time is of the essence and the holiday season has begun, circle back to the Clutter Clear Out in January.

For November and December we invite a slow down and focus on simplifying. We’ll spend the other nine months diving into organizing. Check out our Simplify Your Home and Holidays for all of our suggested actions. 

NOW FOR GIFT WRAPPING

Are you done with the constant mess and overwhelm of too many gift wrapping options and flair as well as never having just what you really need or want? Are you ready to create a simple yet creative and joyful signature style for your gift wrap?

We recommend choosing a solid color of bulletin board paper you love and can work for all celebrations. Have fun changing up the types of bows and ribbons you pair with the paper to suit the occasion as well as express your personal style. Metallic markers are a great option for writing on the paper and decorating it.

Bulletin board paper is super cost effective and will last for years to come. You can even use it for other applications like packing paper, craft projects, and covering your dining table for pumpkin carving. It is heavy duty and recyclable when clean. Most gift wrap, bags, and ribbons are not recyclable. Basically, the fancier the item the less likely it can be recycled.

If bulletin board paper is simply not your style or you want more options, take the time to go through all of your gift wrap and bags to decide what you truly like and want to use. Be willing to donate the rest and stock up on the supplies you love using.

When you are ready for more simple actions, head over to our Simplify Your Home and Holidays page, where you will find more blogs and our eBook chock full of our home and holiday simplifying goodness.

Clear & Simple, SEE IT. MAP IT. DO IT., Simplify Your Home, Simplify Your Holidays, Wrapping Paper
Clear & Simple, SEE IT. MAP IT. DO IT., Simplify Your Home, Simplify Your Holidays

Your Guides to a Simpler Life, Marla Dee & Kate Fehr

We are passionate about teaching The Clear & Simple Way© to transform your life.

Simplify Your Paper

Paper piles seem to land everywhere, from the kitchen counter to the bedroom night table.


How would it feel to walk through your home

and not see even one pile of paper?

Every October we focus on clearing clutter simply and easily with our 30 Day Clutter Clear Out Movement. We’ve created powerful tools you can utilize any time of year to support your journey. If you have some extra time, hop on over there to access these offerings. If time is of the essence and the holiday season has begun, circle back to the Clutter Clear Out in January.

For November and December we invite a slow down and focus on simplifying. We’ll spend the other nine months diving into organizing. Check out our Simplify Your Home and Holidays for all of our suggested actions. 

Now, we know there is nothing simple about paper, yet we’re going to invite you to start there.  Since paper tends to take over the whole house we’re cheering you on to get some order in place before the holiday busyness really creeps in. We’re going to help you get all the piles cleaned up for now and then help you organize them in the new year. This valiant effort will make you and your home feel so much better.  

Step One: Walk around your home and make a list of approximately how many banker’s boxes worth of paper have piled up. 

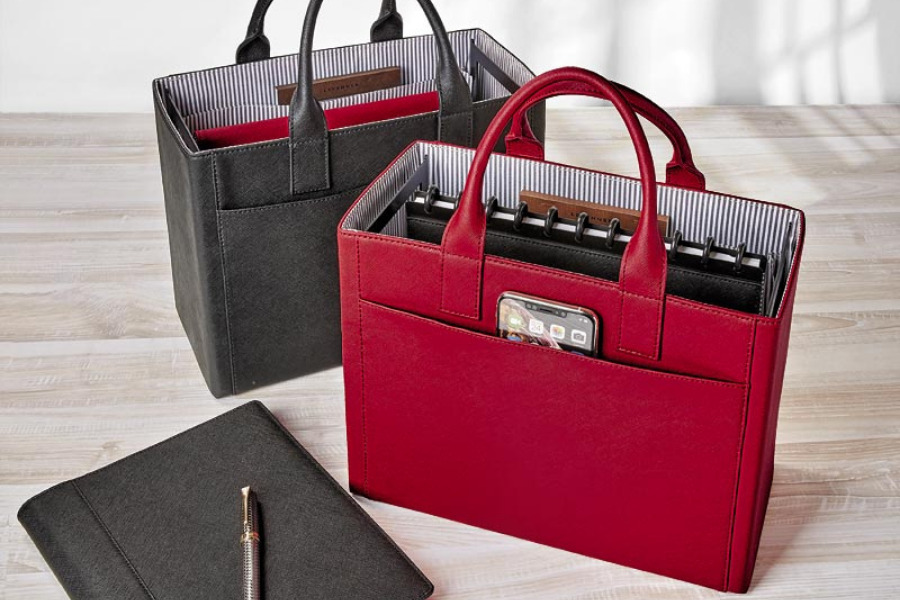
Step Two: Purchase the appropriate number of bankers boxes with file rails or plastic file totes, then a box or two of hanging file folders, super sticky notes in your favorite color, and a sharpie or two.

Step Three: Gather all of the paper piles from around your house (kitchen, dining room, family room, office, bedroom, etc.) filing them as you go according to what room they are in – or according to the general category of paper (kid papers, work project, unopened mail, etc.). Use the Post-its upside down to create a temporary label to stick on the file folders. You may also want a folder or two for things you find that need attention soon, like bills to pay, events that needs an RSVP, or calls that need to be made.

Step Four: Use post-its to label the boxes with something similar to “Papers to Process”, put the lids on, and put the boxes in an easy-to-access, yet out of sight place.

Step Five: Schedule some time in January to process these boxes of paper using our Organize Your Paper guidelines. Seriously, put it on your calendar. 😊

Step Six: Take a few deep breaths and simply be present for a few moments. You just moved a whole of energy. Talk a stroll through your home noticing what a difference it makes not seeing all that paper but to know right where to go if you need to locate something.

When you are ready for more, head over to our Simplify Your Home and Holidays page, where you will find more blogs and our eBook with all of our home and holiday simplifying actions.

Clear & Simple, SEE IT. MAP IT. DO IT., Simplify Your Home, Simplify Your Holidays, Piles of paper, File Tote
Clear & Simple, SEE IT. MAP IT. DO IT., Simplify Your Home, Simplify Your Holidays

Your Guides to a Simpler Life, Marla Dee & Kate Fehr

We are passionate about teaching The Clear & Simple Way© to transform your life.

Your Ultimate Office

What does your office say about you?

I had no idea my office could be this powerful and beautiful!

 – Emily London

www.emilylondonportraits.com

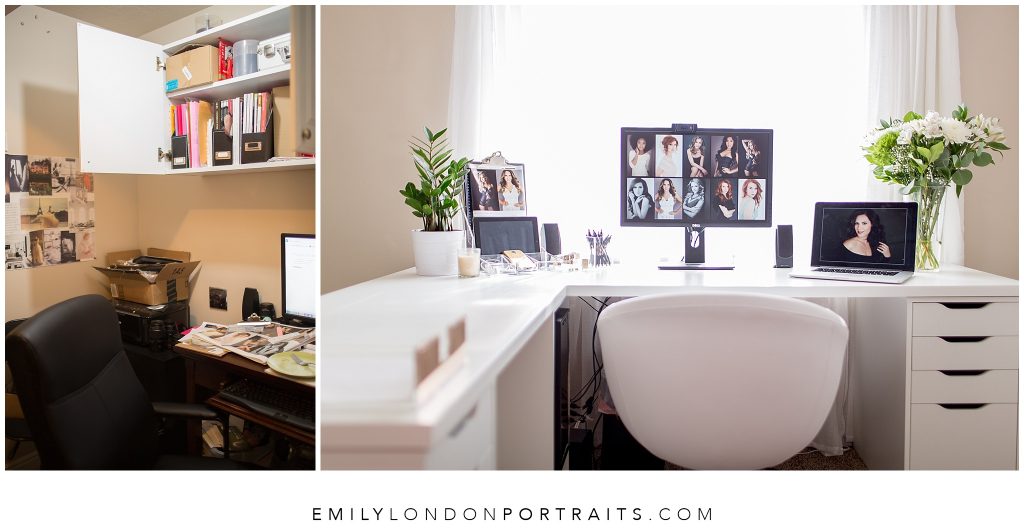
Meet Emily – a fabulous photographer, extraordinary woman, wife, mother and much more. Emily is a true entrepreneur, meaning she launched her first business in her 20’s.  Emily is a highly organized person with the innate skill and she knows how to create beauty.  She stepped into the trap so many home business owners fall into – trying to make a small closet area her home office. Making do just didn’t support her or her exploding business.

The first step for Emily was claiming the space she needed and deserved. We found it right down the hall from the closet. An entire room, mostly empty, being used for supplies.

The next step was asking how she wanted her office to look, feel and function when we were done. You can get help doing this for yourself here www.clearsimple.com/organizeoffice/.

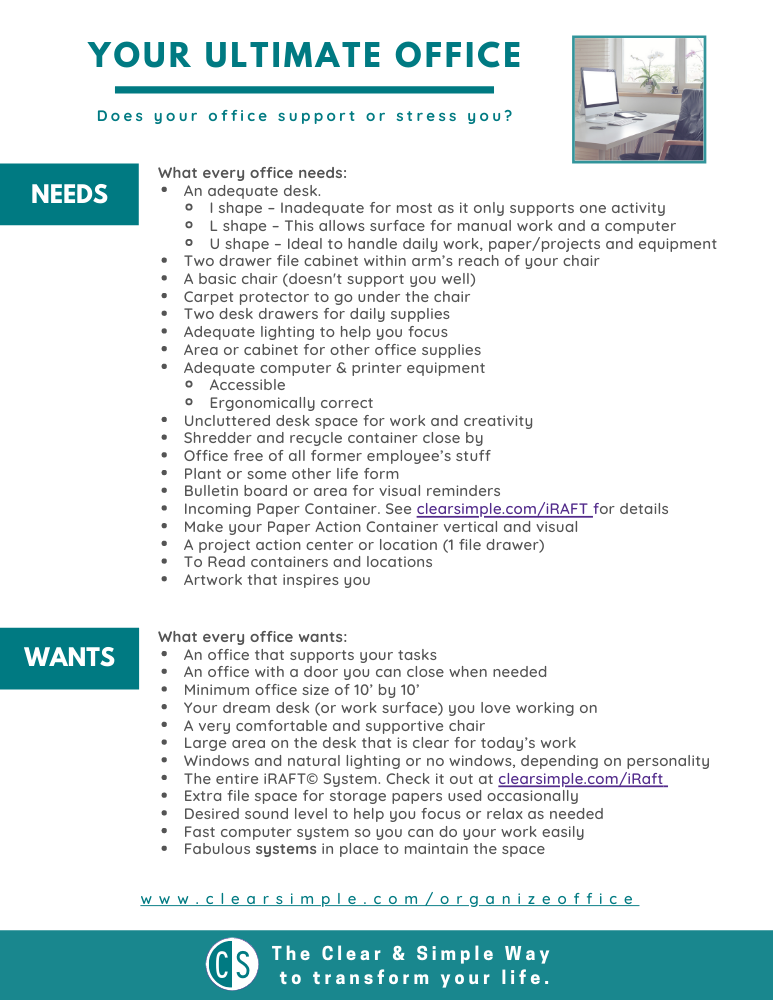
Once you have claimed your space, it’s time to transform it into Your Ultimate Office. Go through Your Ultimate Office Checklist and choose what you need next.

Your Ultimate Office Checklist

  • A great desk you love working on
    • I shape – Inadequate for most as it only supports one activity
    • L shape – This allows surface for manual work and a computer
    • U shape – Ideal to handle daily work, paper/projects and equipment
    • Large area on the desk that is clear for today’s work
  • Two drawer file cabinet within arm’s reach of your chair
  • Very comfortable, supportive chair
  • Carpet protector to go under the chair
  • Two desk drawers for daily supplies
  • Windows and natural lighting or no windows, depending on personality
  • Desired sound level to help you focus or relax as needed
  • Area or cabinet for other office supplies
  • Excellent computer equipment
    • Accessible
    • Ergonomically correct
  • Shredder that is close by
  • Recycle container close by
  • Office free of all former employee’s stuff
  • Plant or some other life form
  • Bulletin board or area for visual reminders
  • Artwork that inspires you
  • An office with a door you can close when needed
  • The entire iRAFT© System for all your paper  www.clearsimple.com/iRaft
  • Extra file space for storage papers used occasionally
  • Fabulous SYSTEMS in place to maintain the space

Get more juicy ideas and guidance at Organize Office

If you want or need help from a Clear & Simple Certified Organizer, reach out to us info@clearsimple.com


Clear & Simple, Marla Dee, Kate Fehr, Organize Your Office
Clear & Simple, SEE IT. MAP IT. DO IT., Marla Dee, Kate Fehr, Organize Your Office, Organize Your Desk
Your Guides to a simpler life, Marla Dee & Kate Fehr. We love teaching the Clear & Simple Way to live free of clutter and get organized at last.

Organize Your Desk

Do you work at your desk? Why or why not?

How many hours each day do you spend at your desk?

Organize and beautify your desk and it will support your best work!

 – Marla Dee

Your desktop is speaking to you – what is it saying? Is it covered in papers and stuff that you can’t see a clear space? Is it holding more items than it needs to? Make your desk the focal point of your workspace and keep it clear and organized so you can find what you need when you need it.

Our Office Steps Guide can help you!

SEE IT – Take a look at where you’ve been and where you are now. Do your best to be neutral and take the observer viewpoint while exploring below:

  • Grab your smart phone and take pictures of your desktop and drawers.
  • When looking at your desk, write the story your clutter tells.
  • Can you even work on your desk? Is it large enough?
  • Take time to write what’s working? You can be specific or general.
  • Is your desktop covered or does it have open working space?.
  • What isn’t working? Where are you stuck and why?
  • What is stressing you the most about your work surface?

MAP IT – Make a written plan for what you want. Have fun and go after what you need and want! Think about how many hours you spend at your desk!

  • Write how your desk will look, feel and function when you’re done..
  • Create an online board of images that reflect what you want most.
  • Create a mind map showing the elements of your ideal work surface. What size, color, type of material, and work area do you want?
  • Now take some time to write a new story. How will you feel when working at your desk? Will you be able to focus and create? Look at our Ultimate Office Checklist for inspiration and ideas.

Make a written plan for what you want. Have fun and go after what you need and want! Think about how many hours you spend at your desk!

  • Write how your desk will look, feel and function when you’re done..
  • Create an online board of images that reflect what you want most.
  • Create a mind map showing the elements of your ideal work surface.

DO IT – Make a written plan for what you want. Think about the big picture and overall goals for your desk. You can work out the details later.

  • Get the size and layout of desk you need to function well.
  • Choose the best spot for your desk by asking – “Where in this room do I want to sit?”. Also, where you have the best light, focus and access.
  • Add an additional surface area (on a side table or behind you) to hold your printer, projects, and papers you need handy, but not at the desk.
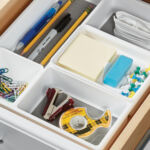
  • Organize your supply drawers – one with office supplies and one with your personal items. Organizer Tip: Use containers inside the drawers to keep the items in place and organized. You will be happy every time you open the drawer and can find what you need easily.
  • Keep you active papers/files in a drawer at your desk or near you.
  • Implement our iRAFT System for all your paper and filing needs.

Get the Clear & Simple SEE IT. MAP IT. DO IT.© steps in the Office Steps Guide

Want help with your whole office – go to Organize Your Office

Clear & Simple, Marla Dee, Clutter Clear Your Paper, Clutter Clear Your Office
Your Guides to a simpler life, Marla Dee & Kate Fehr. We love teaching the Clear & Simple Way to live free of clutter and get organized at last.

Clutter Clear Your Office

A clutter free office helps you focus on your work.

Clutter is delayed decisions

and holding onto the past.

Marla Dee

If you were standing at the doorway of your office with the person you admire most, would you be excited or ashamed? We certainly understand if your work space has become cluttered, disorganized and draining. This is what happens when your work expects more than you can give. You might be spending more time in your work space than at relaxing home. You might even be working from home! We wish more companies would give their employees, and more entrepreneurs would give themselves, at least one day each year just for clutter clearing and organizing.

If you are ready for an office that supports you rather than stressing you, we are here to help. You can start with just your desktop, supply area, or your paper.

Here are three great small projects that can be done in less than an hour. This will get you started and keep you from getting lost in the details. Keep in mind we will take you through SEE IT. MAP IT. DO IT.© for the whole room next. Choose one of the following ideas, schedule the time, turn on music and dive in. Have boxes and bags on hand for what goes elsewhere, donations, trash, and goes to other areas or to other people.

01  DO THE DRAWERS

Clear & Simple, Marla Dee, Clutter Clear Your Paper, Clutter Clear Your OfficeGet ready to have fun! Open your drawers and pull everything out. You can start with the desk catch-all junk drawer or the drawer you dump all your personal stuff in. These tend to be the worst.

After dumping out the contents, sort into general categories such as pens, paper clips, etc. This way you can see how much you really have. Then get rid of the excess or stuff that doesn’t belong there or that you have never used! Honestly, how many pens do you really need? Now, put the drawer back together. Tip – use containers inside the drawer to make organizing and use easier.

02  CLEAR THE DESKTOP OR YOUR WORK SURFACE

Clear & Simple, Marla Dee, Clutter Clear Your Desk, Clutter Clear Your OfficeIt’s amazing how much stuff lands on the top of your desk making it impossible to work there!  It’s time to clear the deck so you can be productive.

Look at what you’re storing on your desktop. The only things that belong here are the active papers you are working on now, active tools, and your computer. If there are papers related to projects, or papers that need to be filed, move to the file drawer area. Supplies you don’t use daily can be moved to a drawer. When you’re done, place one item such as a plant, photo, or inspiration on top.

03  CLEAR THE FLOOR

Clear & Simple, SEE IT. MAP IT. DO IT., Marla Dee, Kate Fehr, Organize Your Office, Organize Your DeskStart at the entry to your office/work area and work your way around the whole area staying focused on the floor. You might be surprised how much has landed here that doesn’t belong or that is now past-time stuff (last year’s financials).

Pick up, bag or box all the stuff that you know needs to leave and get it out of the room! Don’t worry about the other stuff, it comes later. Then grab the broom or vacuum and clear away the old dust and grime. Return to the entry, look around and take in the difference. Just clearing the floor of old items can open space for new to come in.

Done? Take a deep breath. Notice how different your office feels? Now, celebrate what you’ve done.  Find more help below!

Download the FREE Office Steps Guide.

Your Guide Marla Dee.

I love teaching the Clear & Simple Way to live free of clutter and get organized at last.